CentOS中Kvm可视化WebVirtMgr安装部署 温馨提示:安装KVM是需要2台都操作的,因为我们是打算将2台都设置为宿主机 所有都需要安装KVM相关组件
github地址github.com/retspen/web…
WebVirtMgr是一个基于libvirt的Web界面,用于管理虚拟机。它允许您创建和配置新域,并调整域的资源分配。VNC查看器为来宾域提供完整的图形控制台。KVM是目前唯一支持的虚拟机管理程序。
1.安装源和依赖 Centos/RHEL 6.X 1 2 yum -y install http://dl.fedoraproject.org/pub/epel/6/i386/epel-release-6-8.noarch.rpm yum -y install git python-pip libvirt-python libxml2-python python-websockify supervisor nginx
Centos7 1 2 3 4 5 yum -y install http://dl.fedoraproject.org/pub/epel/7/x86_64/e/epel-release-7-5.noarch.rpm if this doesn't work, use yum install epel-release yum -y install git python-pip libvirt-python libxml2-python python-websockify supervisor nginx yum -y install gcc python-devel pip install numpy
Debian 7, Ubuntu 12.04 and until ( excluding ) Ubuntu 20.04 1 apt-get install git python-pip python-libvirt python-libxml2 novnc supervisor nginx
Ubuntu 20.04 and above 1 apt-get install git python3-pip python3-libvirt python-libxml2 novnc supervisor nginx
2.克隆仓库并安装 Django 等 python 包 1 2 3 4 5 6 7 8 9 git clone https://github.com/retspen/webvirtmgr.git cd webvirtmgrpip install -r requirements.txt . manage.py syncdb . manage.py collectstatic
按提示输入 root 用户密码,该用户后面将用来登陆 WebVirtMgr。
1 2 3 4 5 6 7 You just installed Django's auth system, which means you don' t have any superusers defined. Would you like to create one now? (yes /no): yes (Put: yes ) Username (Leave blank to use 'admin' ): admin (Put: your username or login) E-mail address: username@domain.local (Put: your email) Password: xxxxxx (Put: your password) Password (again): xxxxxx (Put: confirm password) Superuser created successfully.
1 ./manage.py createsuperuser
然后测试:
1 ./manage.py runserver 0:8000
用浏览器打开 http://your-ip:8000 并用刚才的用户登陆
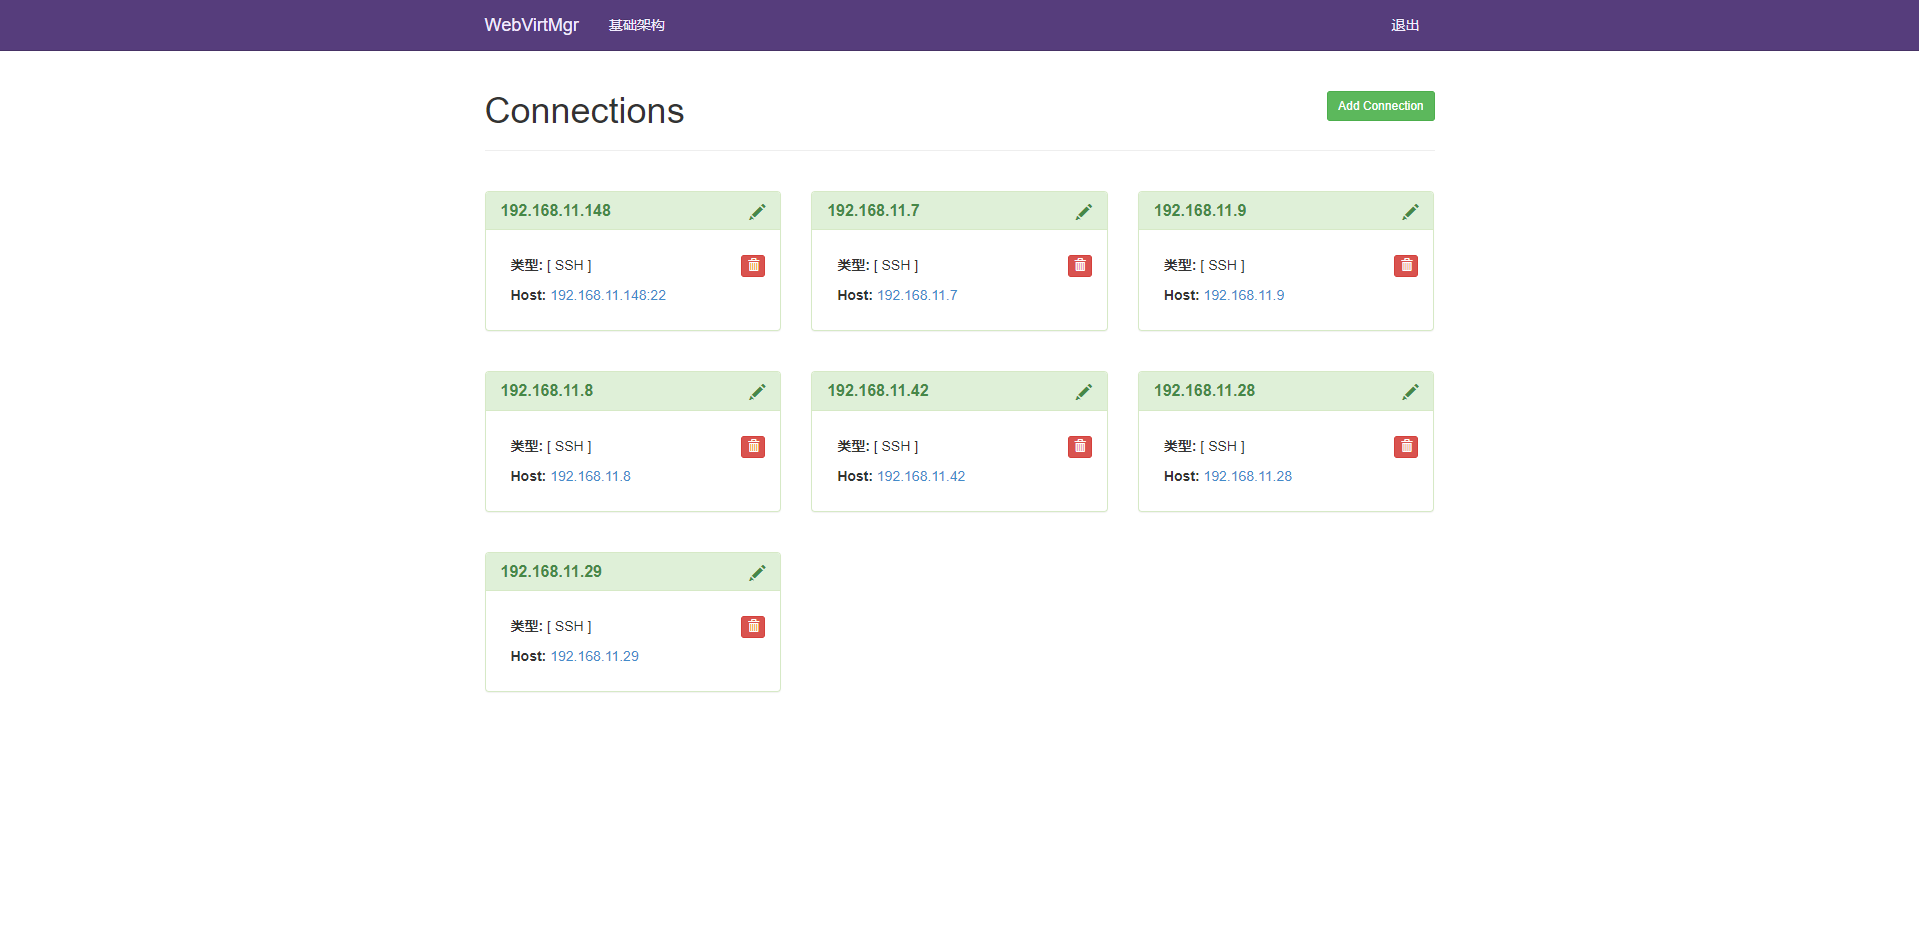
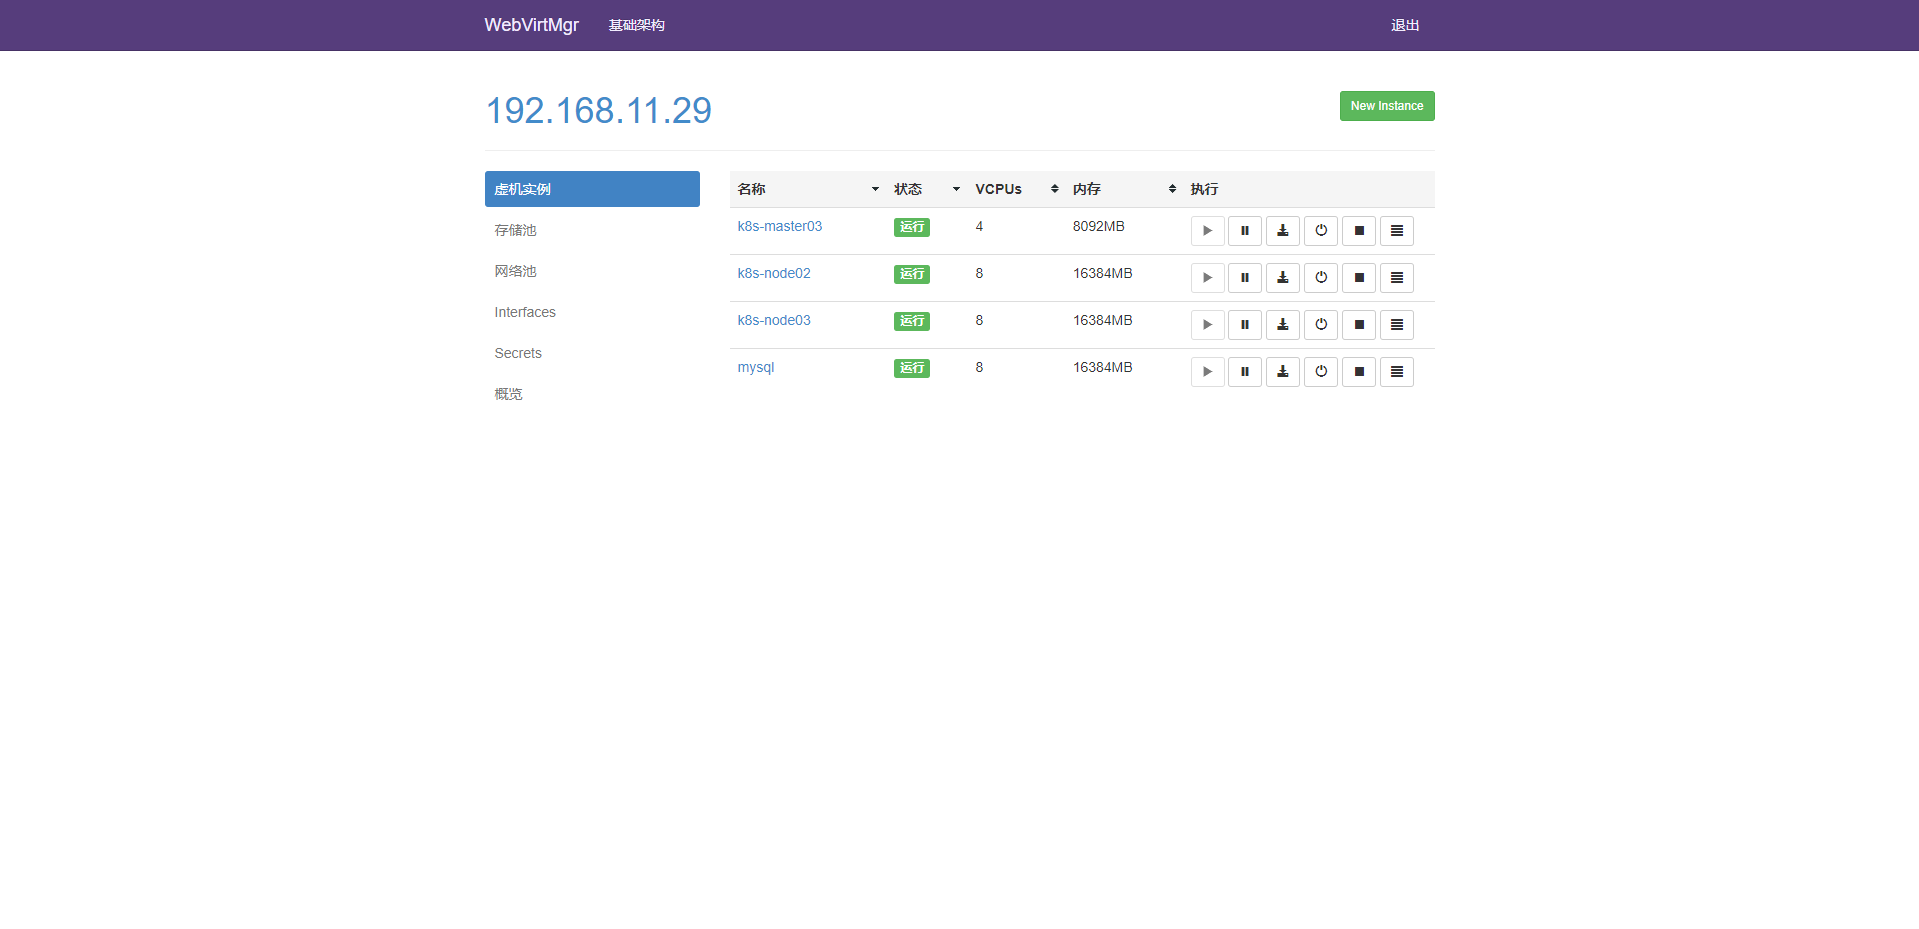
然后点击右上角添加一个 Add connection,把 localhost 这个 libvirtd 的链接用 tcp 的方式添加进去,用户名和密码是刚才初始化的 libvirt 的管理员 admin 和密码,链接如果能够正常添加的话,表明可以正常运行了。
3.下载安装 Nginx 若已经安装nginx或rpm包之类的安装,直接设置nginx的配置文件即可
下载编译nginx 1 2 3 4 5 6 7 8 9 cd /usr/local/mkdir nginx && cd nginxwget https://nginx.org/download/nginx-1.20.1.tar.gz tar xf nginx-1.20.1.tar.gz cd nginx-1.20.1/yum install -y gcc glibc gcc-c++ prce-devel openssl-devel pcre-devel useradd -s /sbin/nologin nginx -M ./configure --prefix=/root/cby/kvm/nginx/ --user=nginx --group=nginx --with-http_ssl_module --with-http_stub_status_module make && make install
设置nginx的配置文件 编辑webvirtmgr.conf到/etc/nginx/conf.d目录
1 2 3 4 5 6 7 8 9 10 11 12 13 14 15 16 17 18 19 20 21 22 23 24 25 26 27 server { listen 80 default_server; server_name $hostname ; location /static/ { root /var/www/webvirtmgr/webvirtmgr; expires max; } location ~ .*\.(js|css)$ { proxy_pass http://127.0.0.1:8000; } location / { proxy_pass http://127.0.0.1:8000; proxy_set_header X-Real-IP $remote_addr ; proxy_set_header X-Forwarded-for $proxy_add_x_forwarded_for ; proxy_set_header Host $host :$server_port ; proxy_set_header X-Forwarded-Proto $scheme ; proxy_connect_timeout 600; proxy_read_timeout 600; proxy_send_timeout 600; client_max_body_size 1024M; } }
如果nginx有默认的配置文件,需要注释掉默认的/etc/nginx/nginx.conf(Ubuntu 14.04 LTS配置文件夹在 /etc/nginx/sites-enabled/default)
1 vim /etc/nginx/nginx.conf
1 2 3 4 5 6 7 8 9 10 11 12 13 14 15 16 17 18 19 20 21 22 23 24 25 26 27
启动nginx 1 2 3 4 5 6 7 8 9 10 11 12 ln -s /usr/local/nginx/sbin/nginx /usr/bin/nginxnginx -t nginx: the configuration file /usr/local/nginx//conf/nginx.conf syntax is ok nginx: configuration file /usr/local/nginx//conf/nginx.conf test is successful nginx nginx -c /etc/nginx/conf.d/webvirtmgr.conf nginx -s reload
4.安装Supervisor服务 CentOS, RedHat, Fedora 1 chown -R nginx:nginx /var/www/webvirtmgr
创建/etc/supervisord.d/webvirtmgr.ini文件 并添加配置
1 2 3 4 5 6 7 8 9 10 11 12 13 14 15 16 17 [program:webvirtmgr] command =/usr/bin/python /var/www/webvirtmgr/manage.py run_gunicorn -c /var/www/webvirtmgr/conf/gunicorn.conf.pydirectory=/var/www/webvirtmgr autostart=true autorestart=true logfile=/var/log/supervisor/webvirtmgr.log log_stderr=true user=nginx [program:webvirtmgr-console] command =/usr/bin/python /var/www/webvirtmgr/console/webvirtmgr-consoledirectory=/var/www/webvirtmgr autostart=true autorestart=true stdout_logfile=/var/log/supervisor/webvirtmgr-console.log redirect_stderr=true user=nginx
OpenSuSE 1 chown -R nginx:nginx /var/www/webvirtmgr
创建/etc/supervisord.conf文件 并添加配置
1 2 3 4 5 6 7 8 9 10 11 12 13 14 15 16 17 [program:webvirtmgr] command =/usr/bin/python /srv/www/webvirtmgr/manage.py run_gunicorn -c /srv/www/webvirtmgr/conf/gunicorn.conf.pydirectory=/srv/www/webvirtmgr autostart=true autorestart=true stdout_logfile=/var/log/supervisor/webvirtmgr.log redirect_stderr=true user=nginx [program:webvirtmgri-console] command =/usr/bin/python /srv/www/webvirtmgr/console/webvirtmgr-consoledirectory=/var/www/webvirtmgr autostart=true autorestart=true stdout_logfile=/var/log/supervisor/webvirtmgr-console.log redirect_stderr=true user=nginx
Debian, Ubuntu 1 2 3 4 5 6 7 8 9 10 11 12 13 14 15 service novnc stop insserv -r novnc vi /etc/insserv/overrides/novnc chown -R www-data:www-data /var/www/webvirtmgr
在/etc/supervisor/conf.d创建/etc/supervisord.conf文件 并添加配置
1 2 3 4 5 6 7 8 9 10 11 12 13 14 15 16 17 [program:webvirtmgr] command =/usr/bin/python /var/www/webvirtmgr/manage.py run_gunicorn -c /var/www/webvirtmgr/conf/gunicorn.conf.pydirectory=/var/www/webvirtmgr autostart=true autorestart=true stdout_logfile=/var/log/supervisor/webvirtmgr.log redirect_stderr=true user=www-data [program:webvirtmgr-console] command =/usr/bin/python /var/www/webvirtmgr/console/webvirtmgr-consoledirectory=/var/www/webvirtmgr autostart=true autorestart=true stdout_logfile=/var/log/supervisor/webvirtmgr-console.log redirect_stderr=true user=www-data
5.重启supervisor服务 Ubuntu, Debian 1 2 service supervisor stop service supervisor start
CentOS, RedHat, Fedora 1 2 service supervisord stop service supervisord start
centos没有supervisord服务可以重新加载一下
5.1更新- CentOS, RedHat, Fedora Read README.md check settings (maybe something has changed) and then:
1 2 3 4 cd /var/www/webvirtmgr git pull ./manage.py collectstatic service supervisord restart
5.2更新- Debian & Ubuntu Read README.md check settings (maybe something has changed) and then:
1 2 3 4 cd /var/www/webvirtmgr git pull ./manage.py collectstatic service supervisor restart
5.3更新 - OpenSuSE Read README.md check settings (maybe something has changed) and then:
1
2
3
4
cd /srv/www/webvirtmgr git pull ./manage.py collectstatic service supervisord restart
5.4Debug If you have error or not run panel (only for DEBUG or DEVELOP):
1 ./manage.py runserver 0:8000
Enter in your browser:
1 http://x.x.x.x:8000 (x.x.x.x - your server IP address )
6.web界面配置 添加主机设置存储
1.Add Connection 添加宿主机(即KVM主机)
2.点击SSH连接
3.Label 为主机名,必须为主机名做免密
4.IP 为宿主机IP
5.用户名为服务器用户名
6.点击添加
如下图 ,为添加kvm主机效果图:
安装完成